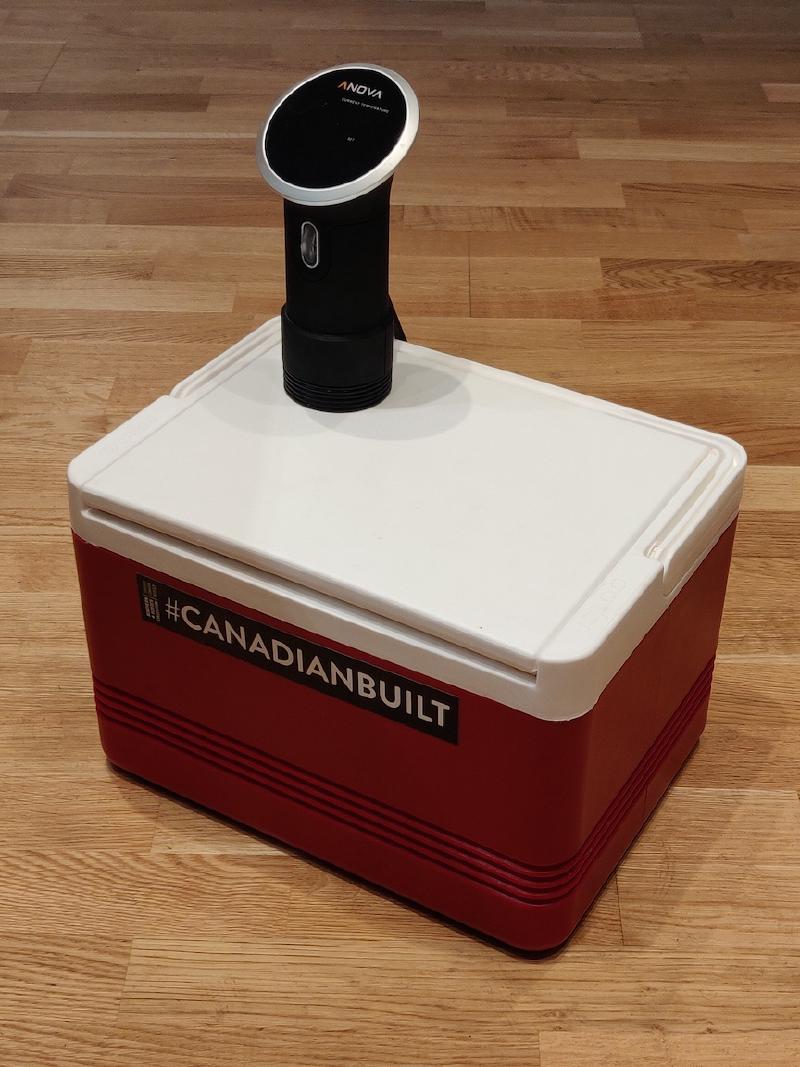
Last year I built a DIY insulated sous-vide container using $10 of IKEA parts. It worked pretty well, using 60% less electricity than an uninsulated container. But it was a bit of an eye-sore, and I got tired of leaving a mess of towels out on my kitchen counter.
Can we do better? I did some research on sous-vide cooler hacks and was impressed by the build described in this Chowhound thread. So I set out with those instructions, but made a few modifications along the way. The main change I made was to drill the hole in the back of the lid rather than the front, so that it can be opened without removing the sous vide unit.
Necessary supplies
| Item | Notes | Cost |
|---|---|---|
| Igloo Legend 12 cooler | This size is perfect for weeknight cooks. It is shallow enough to only need 4.5L to fill, but wide enough to be opened without removing the sous vide device from the lid every time. | $21 |
| Spray foam insulation | We want something with good thermal properties, and which comes in a can with a spray nozel, so we can spray it into tight spaces. | $8 |
| Silicone caulk] | We really don’t need much, so just get a small container. | $4 |
| 60mm x 3.5mm o-rings | These are for outside the lid, to adjust how deeply the sous vide unit sits. | $6 |
| 40mm x2mm o-rings | These are for inside the lid, to keep the unit snugly in place when the lid is opened. | $4 |
| Total | $43 |
We’ll also need the following tools:
- A reasonably powerful power drill
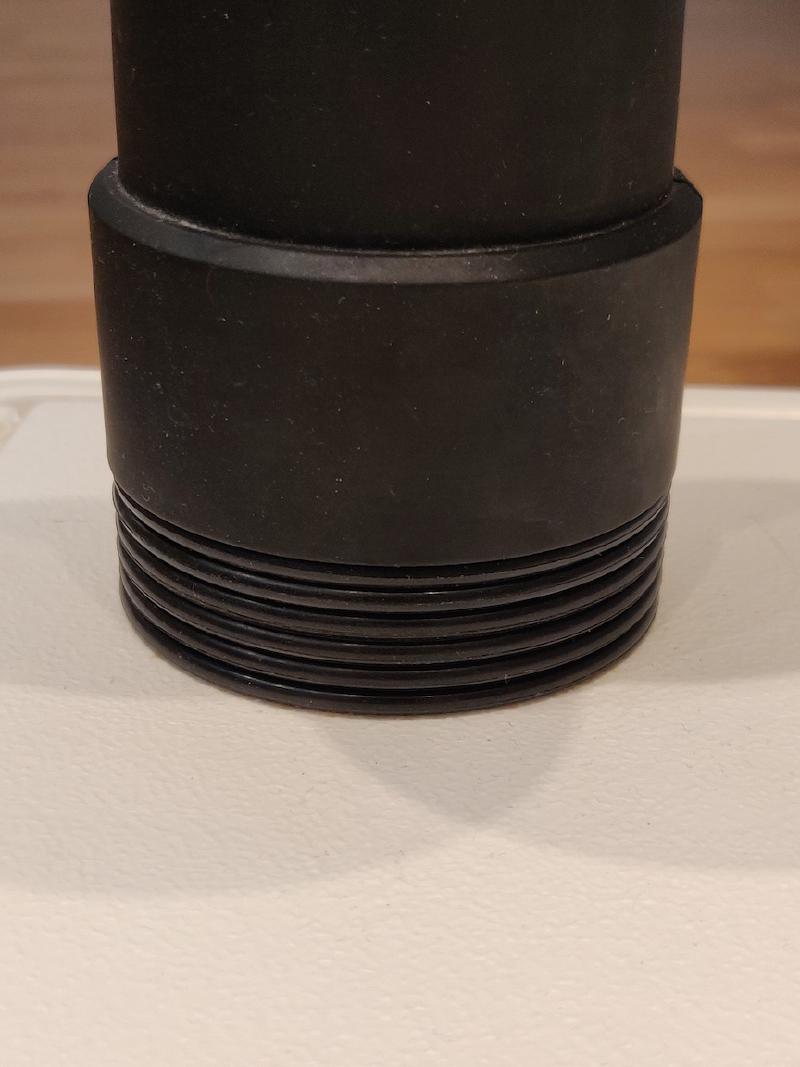
- 60mm hole saw bit – You’ll want this to match the diameter of your sous-vide unit as closely as possible so that it fits in snugly. My Anova unit (original version) needed a ~62mm hole, so I used a 60mm bit and sanded it down until it fit. If you are using a newer version, check the diameter of your unit.
How to build it
Fill the cooler lid with insulating foam
Drink coolers are designed to keep their contents cold rather than hot. So it would make sense for the cooler to have better insulation around the sides and bottom than the top lid. But since heat rises, we care disproportionately about the thermal performance of the top lid. The top lid of the Igloo Legend 12 cooler is hollow, so we can reduce heat loss even further by filling it with spray insulation foam.
Here’s how:
- Drill a bunch of small holes on the underside of the lid, just slightly larger than the diameter of the foam insulation hose nozzle. We want to use multiple holes, since the foam will expand inside the lid, and may cause it to deform if we spray it all into one corner. Better to distribute it evenly throughout the lid.
- Lay out a few sheets of newspaper on the ground. This will get messy.
- Distribute the spray foam inside the lid as deeply into corners as possible. Leave some extra space near each hole. The foam will expand greatly over the course of 24 hours, so you it to expand from the corners towards the holes, so that all the air escapes. Err on the side of less, because you can do apply another round after 24 hours if the foam has not expanded to entirely fill the lid.
- Wait 24 hours, then break off the bulbs of hardened foam which are protruding from the holes we drilled earlier.
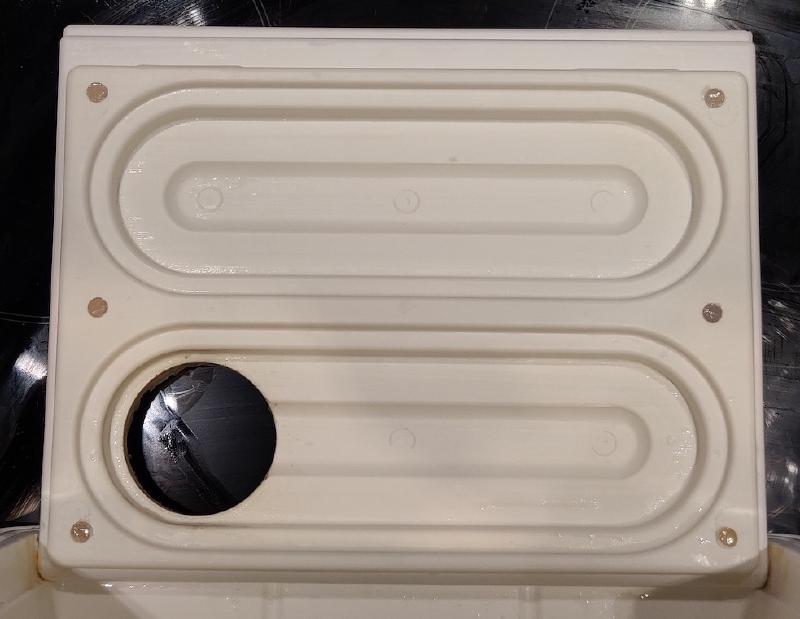
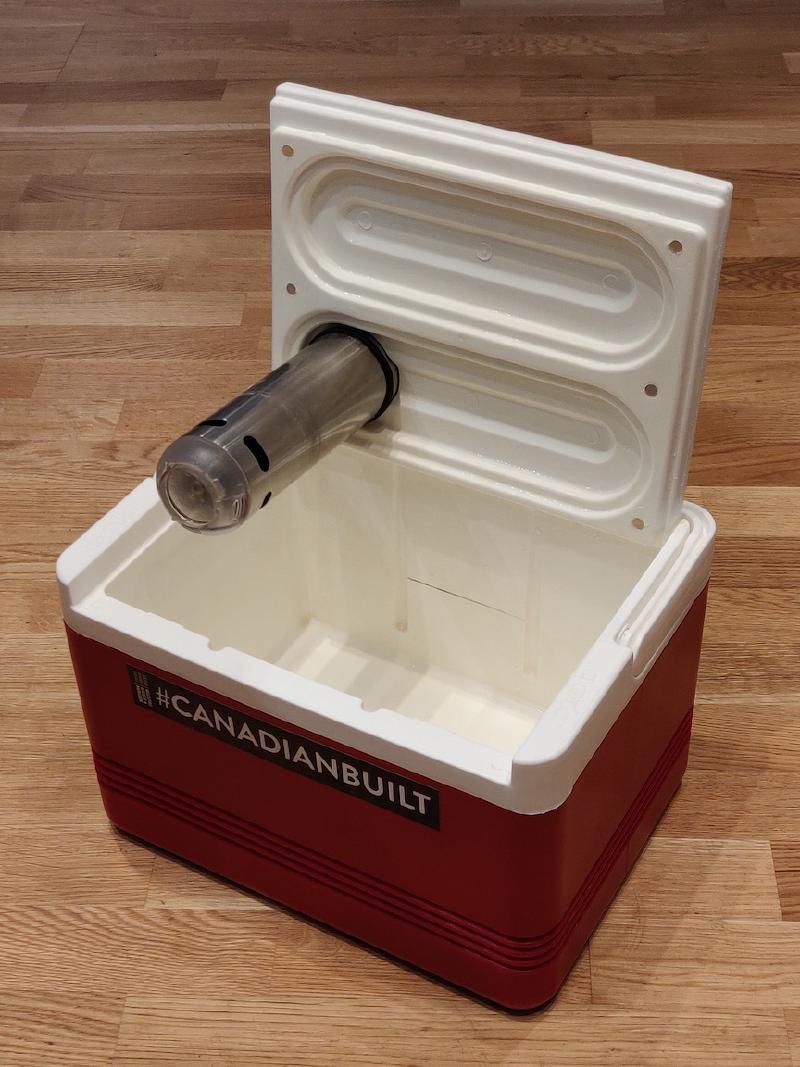
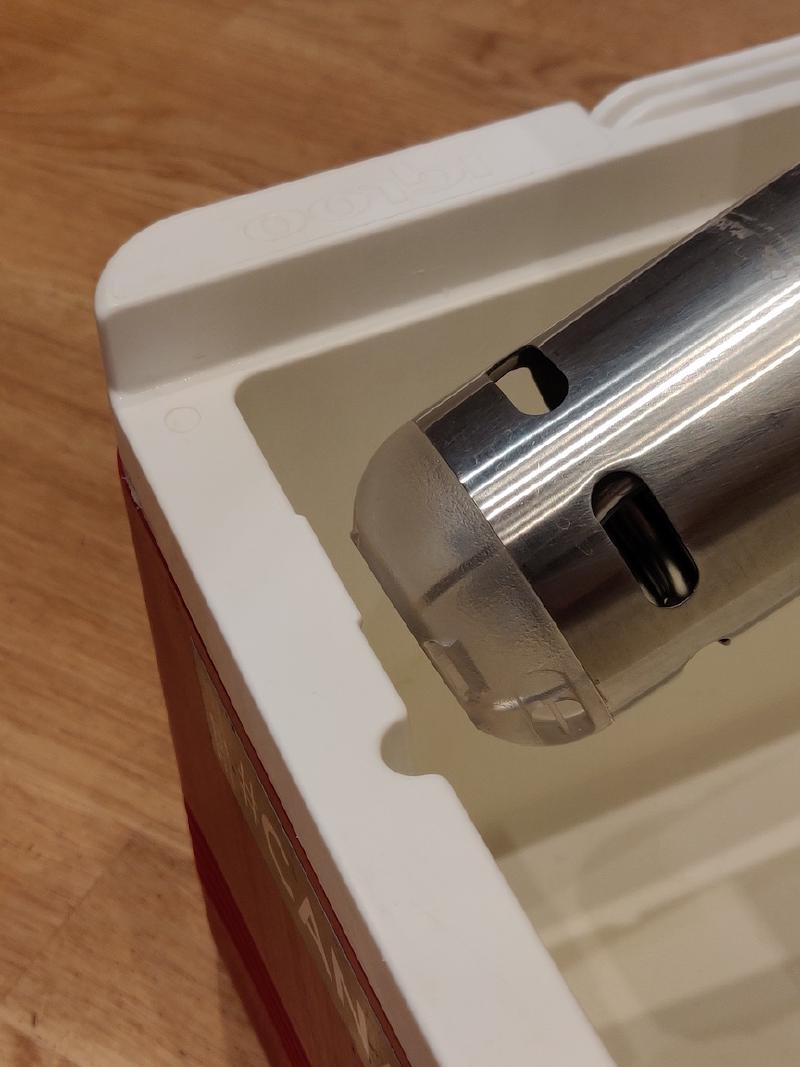
Drill a hole for the sous vide unit
- Pick a spot on the lid you want to drill. I suggest somewhere near the back hinge, so that you can open the lid fully without removing the sous vide unit. The Igloo cooler I was using has a natural spot for the hole.
- Measure the diameter of you sous vide unit, and drill a hole using the appropriately sized circular saw bit. Err on the side of smaller for a snug fit. You can use sand paper to slightly expand the hole after drilling it.
Seal off holes with silicone
Now we want to apply silicone caulk to all the holes in the lid, so that moisture does not get inside during use.
- Carve out a bit of foam insulation around each of the holes.
- Apply a bit of silicone caulk to each holes.
- Do the same around the rim of the main hole.
- Use a credit card or another flat surface to smooth the caulk.
- Wait 12 hours and touch up if necessary. The rim of the main hole took me 2-3 applications until I was confident it would be waterproof.
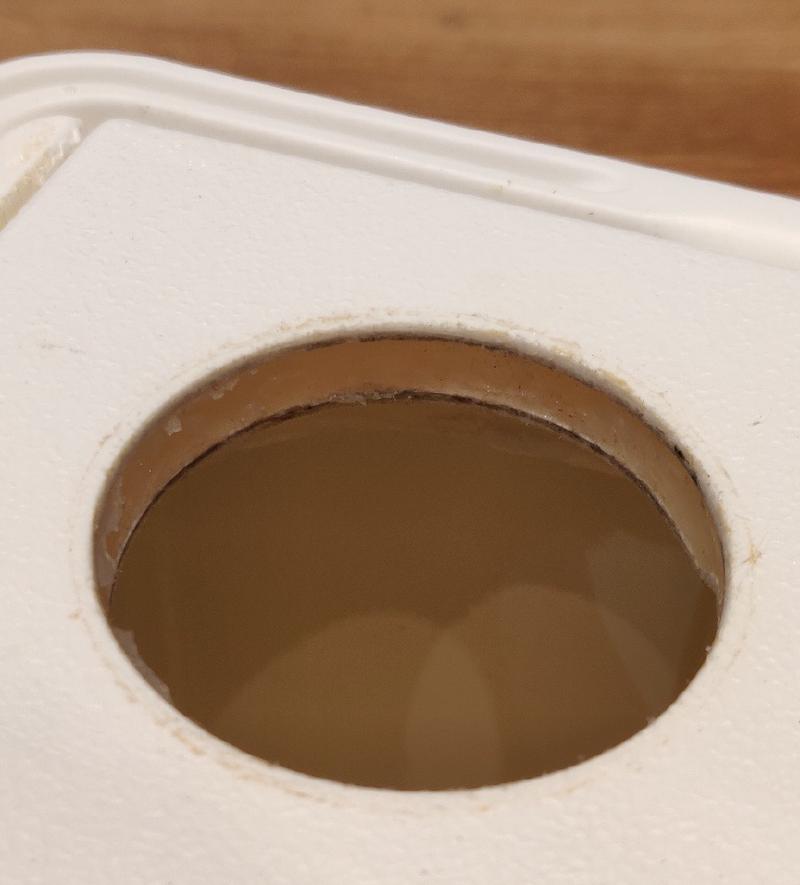
There is some room for improvement here.
Insert sous vide (with o-rings)
Now you can insert the sous vide unit into the main hole. Add o-rings to the top of the unit until it sits high enough that the stem clears the edge of the cooler when the lid is opened.
The exact o-ring size doesn’t matter much.
Make sure it clears the edge when the lid is opened.
Mark the fill line
Measure the depth of the cooler, subtract the offset from the o-rings to the fill line on your unit, and mark a line inside the cooler using a permanent marker and a ruler.
Energy efficiency
I ran a series of tests using a TP-Link Kasa Smart Plug to measure energy expenditure. For each test, I brought 4.5L of water up to 66°C and then started measuring after the water reached temperature.
This is the same temperature as the previous tests), but this time using only 4.5L of water instead of 7L. Although this may give our new build a slight advantage, it reflects the minimum amount of water necessary to reach the “min” marker on the sous vide unit, and so I think it best reflects real-life usage.
| Hours | Energy (kWh) | Watts |
|---|---|---|
| 23.5 | 1.00 | 42 |
| 11 | 0.45 | 41 |
| 12 | 0.49 | 41 |
| — | Average | 41 |
So this cooler build uses a further 30% less electricity than the previous build when it was wrapped with towels, which used 63 watts. It uses a full 75% less electricity than the unwrapped container, which used 148 watts. So our new build is the best of both worlds! It is the most energy efficient, and also looks better on the kitchen countertop than either of the previous options.
Using it as a regular cooler
After a bit of trial-and-error, I found this 63mm plastic plug on AliExpress which fits perfectly into the hole at the top of the cooler. This is pretty useful, because then you can use the cooler as both a sous vide container and as a regular cooler when necessary.